• Home
  • About
  • Life Style
    • Adventures in Japan
    • Food
    • Otaku Related
    • Personal Life
    • Reviews
    • Events
  • Links
  • Contact
YouTube carrd twitter instagram

mika's online diary

Hi guys! So 2 days ago, I finally went to the Kawaii PH headquarters with Kaye (dolly kaye) and I was expecting I wouldn't be surprised because I knew it would be kawaii, but guess again! it was beyond my expectations! Can't wait to visit more often~
This will be a bunch of photo spams lol

Downstairs "dining room"~


Seriously love this tea set!


Took a picture of sakura's box with the awesome sakura tree


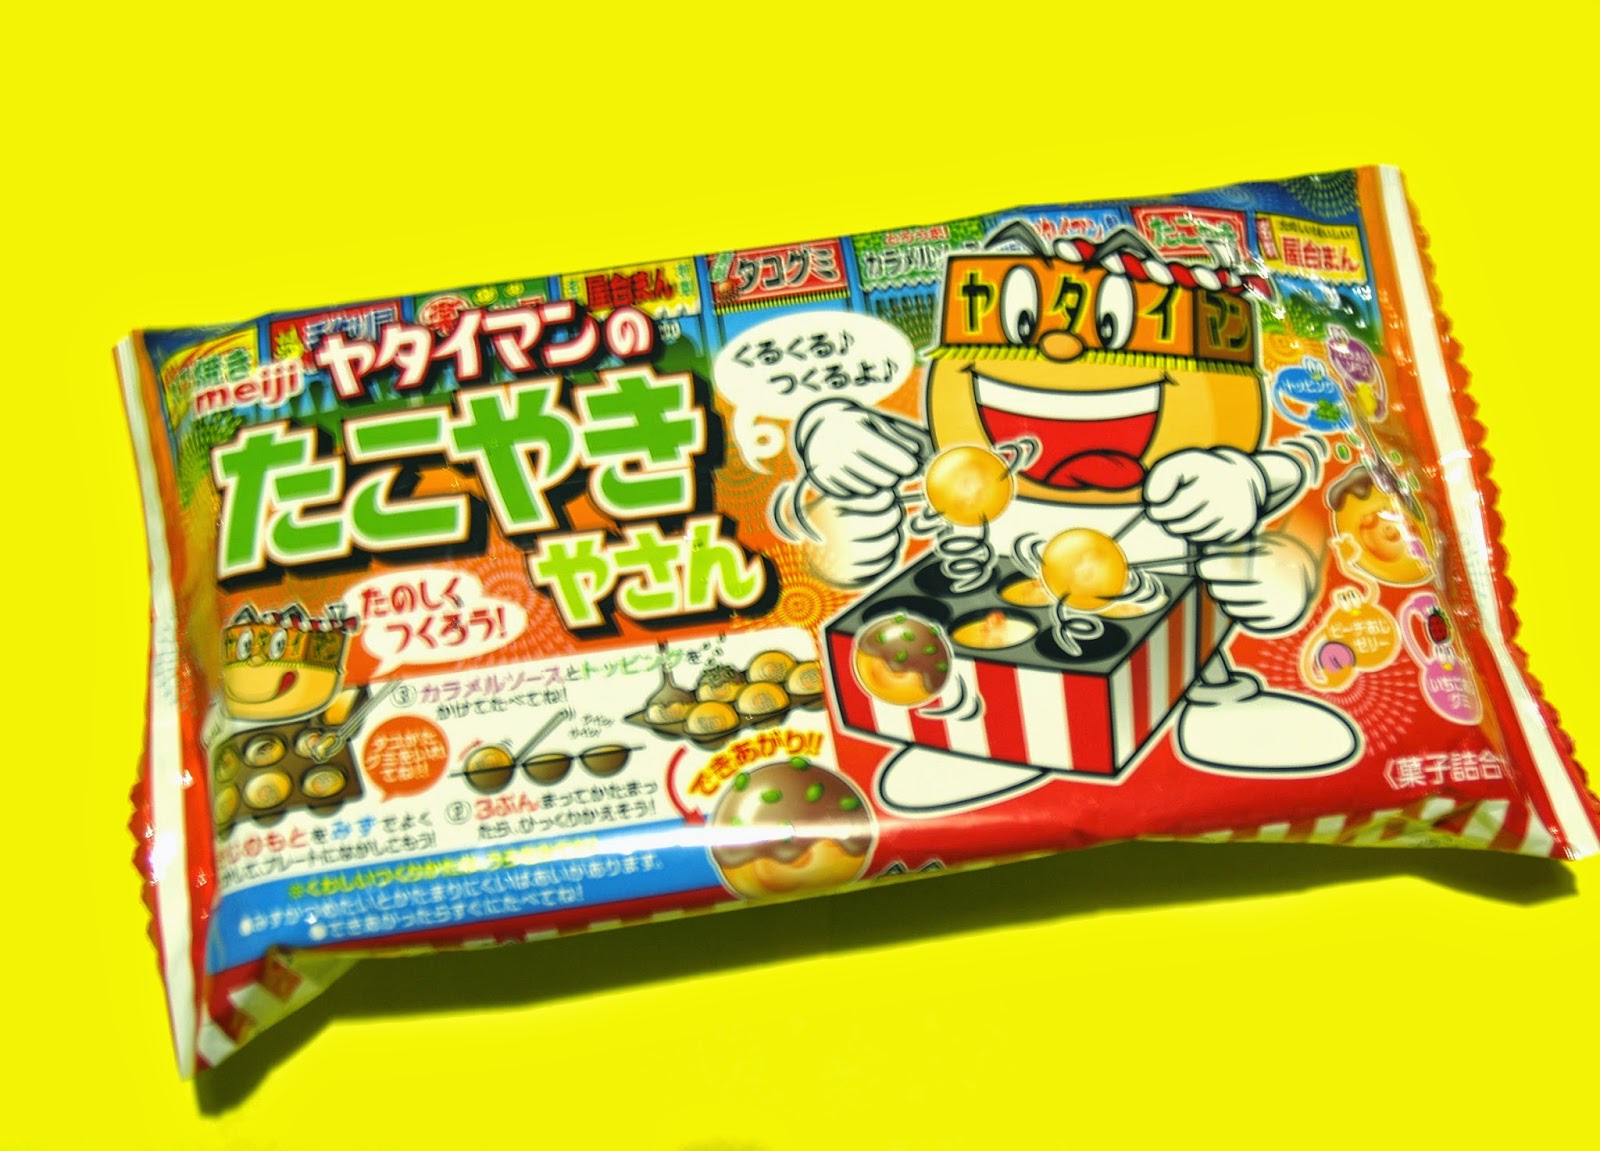
And kaye gave me this! from Kaila from japan! lol! super happy!! Thank you again so much master!! Kaila is such a thoughtful person... and that's one of the things I love about her!~ ^^;;

And I got tomoyo!! Super happy!


Kaye insisted we open it cause she was also excited lol! tomoyo is my fave character so I'm super happy!


Look at all these hatsune miku's~


I was super happy to see this on the wall! my first photo with Kaila during our first meeting was here! *^*


Of course a selfie with kaye is a must!


and a solo selfie as well lol


I really loved the ambiance of the HQ~ see you soon!
Share
Tweet
Pin
Share
2 comments

And mica's back with another Candy Kit tutorial and review! *clap clap clap* this time it's the Meiji Takoyaki DIY candy kit! I actually have high expectations on this because it's Meiji, so! I properly took pictures this time, and will be writing a tutorial and later on my verdict on the candy!
So first, lez go ahead and open the candy and see what we got!


So we got 4 packets, a spoon/mixer, and the takoyaki mold!
The pink packet is for the takoyaki mix, the orange one is the octopus jellies, the silver one is for the sauce, and the green one is for the toppings~

First, separate the takoyaki mold from the water/mixture mold


Then pour in the contents of the pink packet into this container, and add water just where the line would be (there's a line in the container itself) and start mixing


Once you get a foamy texture, pour the mixture in halfway in the takoyaki mold, make sure you dont fill up the whole circle


Once you've completed it, it's now time to add the octopus gummies to the mold then with the remaining mixture, cover/fill everything up


Once you've poured everything, give it a good 1 to 2 minutes before flipping the takoyaki's over.
Use the spoon to flip it over


It looks smoother and better once you've flipped it~
Then take the silver packet, and pour the sauce on top


After that, take the green packet, cut just a small hole, and carefully tap the packet on top of the takoyaki


And voila!


You've got your own candy Takoyaki set!
Taste verdict, they actually taste like regular gummies lol, but I suggest you use cold water for the mixture because it feels good when you're chewing the candy~
overall I'd give it an 8/10 score~

You can buy these in Trinoma, I think 2nd floor beside the escalator, there's a food bin stall and they sell a bunch of candy kits and you can get this for only 180 php!
You can also order through their Instagram acct : thefoodbin
Or you can also order online from amazon and from candy kit stores!


Thank you for visiting and hope you visit again!
Share
Tweet
Pin
Share
2 comments


Hi guys! so I'm back with another blog post, but this time, it's not just any old review or candy kit tutorial I'll be doing, this is a Kawaii DIY phone case tutorial! I posted a photo of the finished product a few days ago and people have been leaving comments expressing their excitement with the tutorial I'll be doing, so first of, I'll be listing all the materials needed, and at the end, i'll be giving TIPS so make sure to read the whole post before asking questions lol

LETS GET STARTED!

I. THINGS YOU'LL NEED
  1. CLEAR phone case. It doesn't have to be an iphone case, it can be any phone case you want as long as it's a clear one and preferably rubber or silicone texture. I got mine at Alabang Town Center, but most "Tiangges" have these clear cases, and even amazon or ebay. 

2.) Your Sakura Card stationary or Clow card stationary (whichever works for you)
WHERE TO GET YOUR CCS STATIONARY: you can order/purchase your own pad of kawaii CCS stationary from JapanLover.Me Store (you can follow the instructions on how to order and they'll be ordering it for you!)


3.) Kawaii Stickers you may want to stick to the case (OPTIONAL)


4.) Pencil and Eraser


5.) Extra Accessories 


6.) Scissors or Cutter

II. PATTERN AND CUTTING PROCESS

**Disclaimer: My boyfriend traced and cut the paper out for me so credits to the amazing mike for the awesome and flawless cutting, but WARNING, there was a mistake made here, which will be corrected later on**

First, you place the case on top of the Sakura stationary and trace out the case on the paper.


After tracing it out, if you don't have a cutter, you can use scissors, but if you don't want to fold the paper to cut in between the camera hole, you can actually cut from the top, cut the circle, then tape the back of the paper and it's not noticeable from the front. 

Don't forget to cut the edges as well!


Once you've taped the back, you barely notice the cut on the top part to cut the camera hole

NOW, here's the mistake, when we were about to attach it, we realized he traced in the wrong face of the paper, which ended up being on the opposite side, so, what he did, was he taped back the hole he cut out, traced it again, and cut another hole on the other end (the correct end) and we just placed the paper under the case before inserting the phone, and voila!


If you can see, I actually sticked a sticker just to divert the attention from that hole, so DON'T make the same mistake we did lol! My case actually had holes for accessories to go through, so I added my CCS star key pendant and sakurafied my phone!

You can also get the star key from JapanLover.Me Store so order now!

TIPS:
  • Make sure you're paper is facing the right direction before tracing and cutting
  • Order these awesome sakura papers/stationary pad from JapanLover.me 
  • You can choose other designs as well for the star key
  • if you have a larger phone, for example an iphone 6 or a note 3 or 4, just use more than 1 stationary (when you order this it comes in a pad so there's a lot) cut between the stationary and just combine them one by one on the inside of your case, sort of like a puzzle, again you can use more than 1 paper for larger phones, for smaller phones, just trace and cut through it.  
  • No need to glue/stick the paper to the case, because it will be on the inside of the case so that it will look like it's printed onto the case itself
  • AGAIN for larger phones, use more than 1 paper, if you want, you can actually label them underneath to make them look like they're different sakura or clow cards.
  • ANOTHER thing you can do is order the blank sakura card. (from JapanLover.Me as well) If you notice on the first picture, you'll see sakura cards that are blank, it's the front view not the back view, and you can draw/design/name them anyway you want, and they are also larger than the actual paper I used on my phone, so you can totally use those as well, plus! you get a more customized feel to it!
    here's an example by Jenni our kawaii illustrator at the Cardcaptor Sakura Club
(photo from Jenni Illustrations)

These sheets are larger so you can order these instead for larger phones if you want to customize/draw as well!

So those are the tips that I can give you but if you still need help, feel free to leave a comment! 
That's it for this post! bye bee!

Share
Tweet
Pin
Share
2 comments
(image from deviant art)

Hi guys! Since it's summer vacation, I noticed I've been super active these past few days with my blog, so! for today, I will be posting pictures and as well as pairing it up with a review, for the Happy Kitchen Hamburger candy kit! the cover image is not my work, the reason why I didn't post the pictures of my candy YET, is so that you'd see how much I failed this kit, and to be honest, I don't know why.. lol! but! I will also be sharing a video (by Paper Pastels) on how to do it (without failing it) I don't want to make a tutorial because honestly, you'll laugh at my burger... lol!
Let's get started!


So once you open the box it comes in a super cute packaging which you can also use as a place mat for your tinkering and cooking!


You get a total of 6 packets all labeled and color coded, a small spoon (kinda), a knife, a cup, and your containers!


You need to cute the containers (just follow the lines lol) so that it would be easier to mix everything~ 
Note: You'll need a microwave btw
I started with working on the french fries!
(these will just be photo spams cause this ain't a tutorial lol)


TIP: Once you've mixed the water with the powder, flatten the dough because there are like line patters at the button for your guide when you cut it to become french fries, in the instructions it says to microwave it for 30 seconds, but BE SURE to know how powerful your microwave is, ours turned out to be too strong, so the fries were actually a little burnt and super crunchy on the other parts lol
So I had to be careful with the other mixtures!


I prepared the patty next! It kinda looks disturbing but no need to fret!
On with the buns!


On the video tutorial I was following, the mixture for the buns were actually pretty liquidy, so I'm not sure why mine didn't come out the same so I had a hard time flattening it, you need to microwave this as well so I only microwaved it for 20 seconds..


And after I took it out... it didn't look so well so I stopped taking pictures at this point... 
but!... here's the finished product.. you will laugh at this..

JAN JA JAAAAAN


I DON'T KNOW WHY IT LOOKS SO UGLY!! I did my best looool!
The buns were super ruined and I cry ;AAAA; but! lets move on to the taste review..

  1. French Fries - The fries tasted like baby food, probably because it was a little burnt
  2. Ketchup -  It seriously tasted like ketchup! 
  3. Cheese - YEP like cheese!
  4. Soda - I actually liked the soda, it kinda tasted like Coke, mixed with a grape flavored juice
  5. Burger - so the overall taste of the burger... it was okay lol
So that's my review for the burger candy kit! You can actually buy them (cheaper) at the food bin! they have like a small stand in trinoma near the escalator and its only for 250! (if you buy it in other stores it can go up to 300 w/o shipping fee)

If you decided to buy one, here's a detailed video on how to make the burger!
(so that you won't fail like I did)


Share
Tweet
Pin
Share
No comments
Newer Posts
Older Posts

About me


Iff62X.png

31 | MNL ~ JPN | 日本語 Translator | Fujoshi | Otaku | Pokemon Master | Dog mama |

Find Me

  • carrd
  • twitter
  • youtube

Blog Archive

  • ►  2020 (4)
    • ►  March (4)
  • ►  2019 (13)
    • ►  July (4)
    • ►  April (6)
    • ►  March (2)
    • ►  January (1)
  • ►  2018 (2)
    • ►  February (2)
  • ►  2017 (24)
    • ►  November (1)
    • ►  September (1)
    • ►  July (2)
    • ►  June (1)
    • ►  May (5)
    • ►  April (3)
    • ►  March (5)
    • ►  February (1)
    • ►  January (5)
  • ►  2016 (44)
    • ►  December (2)
    • ►  November (2)
    • ►  October (5)
    • ►  September (3)
    • ►  August (2)
    • ►  July (4)
    • ►  June (4)
    • ►  May (2)
    • ►  April (4)
    • ►  March (3)
    • ►  February (6)
    • ►  January (7)
  • ▼  2015 (74)
    • ►  December (5)
    • ►  November (4)
    • ►  October (5)
    • ►  September (2)
    • ►  August (3)
    • ►  July (11)
    • ►  June (7)
    • ►  May (4)
    • ▼  April (7)
      • Kawaii PH Headquarters
      • DIY Meiji Takoyaki Candy Kit Tutorial and Review
      • Cardcaptor Sakura DIY iPhone case tutorial
      • DIY Japanese Candy kit: Hamburger Kit
      • Inspiration Series: Rainbowholic (Kaila Ocampo)
      • JapanLover.Me Shopping Service Review
      • Tamashii Convention 2015
    • ►  March (6)
    • ►  February (10)
    • ►  January (10)
  • ►  2014 (19)
    • ►  December (6)
    • ►  November (7)
    • ►  October (6)

♡Blog Views♡

♡顧客さん♡

Flag Counter

2020 © m a r o t e s q u e by Micaela

Created with by ThemeXpose